Find Out More With Tutorial Here – AESCRIPTS.COM

Quickly generate social media reels, short videos, or tutorials with just a few clicks. Forget about manually trimming or splitting long footage. Instead, place markers by pressing the asterisk (*) key where you want to split the footage, and this tool will divide the selected layer into multiple short clips. Use the In-Out button to specify the in and out points of your clips. Alternatively, you can use the ‘Lazy’ button for automatic cuts with your desired clip length.
Introducing Rapid Reel Composer, a powerful After Effects tool designed to simplify your video editing process and enable you to effortlessly create social media reels and short videos in just a few clicks. This tool eliminates the need for manually trimming and splitting lengthy footage. To split your video into shorter clips, all you need to do is place markers by pressing the asterisk (*) key on your keyboard at the desired sections of your footage. Rapid Reel Composer will automatically split the selected layer into multiple short clips at the marker locations. You have two methods to choose from: the In-Out method and the ‘Lazy’ method. Rapid Reel Composer is loaded with various other convenient features that will save you time and streamline your workflow, reducing the need for repetitive tasks.
Key Features:
• Trim footage based on markers.
• Premiere Pro workflow supported: Nest all clips, replace nested footage with After Effects project, use it in After Effects without leaving Premiere Pro.
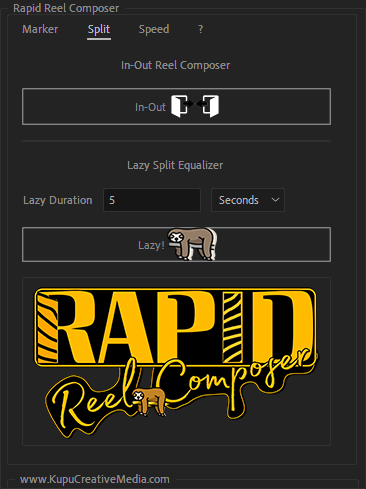
• In-Out: Trim footage to the desired length based on In & Out points.
• Lazy: Automatically trim footage to the desired length starting from the In point.
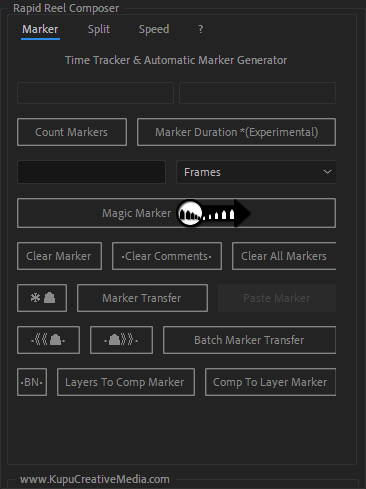
• Magic Marker: Automatically place markers at the desired intervals.
• Sequence: Easily stagger or overlap layers with a single click.
• Batch Marker Transfer: Copy all selected layers’ markers in a null.
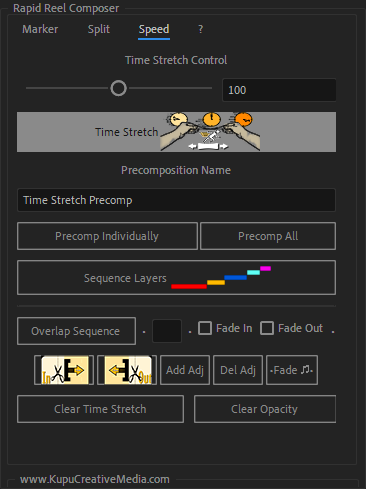
• Speed: Time-stretch layers with a single click to speed up footage.
• Marker Transfer: Copy markers from a single layer, and paste into multiple layers.
• Layers to Comp Marker: Copy multiple layers markers, send as Comp marker.
• Comp to Layers Marker: Copy comp area markers, and send to multiple layers.
• Clear marker comments and/or markers
• Detect marker’s In & Out duration, make comment stats (experimental feature)
• Shift Markers: Shift markers forward or backward by 1 or 10 frames.
• Laptop Markers: Conveniently add markers if you don’t have an asterisk (*) key.
• BN: Set the work area with a single click for selected layers..
• Precomp: Precompose individually or for all selected layers within one comp.
• Fade In and Fade Out overlapped layers, including audio.
• Adjust or change audio volume with a single click.
• Add adjustment layers of the same length as the selected layers.
• Utilize handy buttons to trim layers.

Features at a Glance:
Rapid Reel Composer operates seamlessly with markers. Editing your footage is a breeze – simply place markers on the layers you wish to edit. You have the flexibility to set markers individually on each clip or consolidate all clips into one composition and set markers there. Before setting markers, you have two options:
Precision Mode: For fine-tuned clip trimming, set both In and Out point markers manually.
Lazy Mode: If you’re short on time, let Rapid Reel Composer automatically place markers for you.”
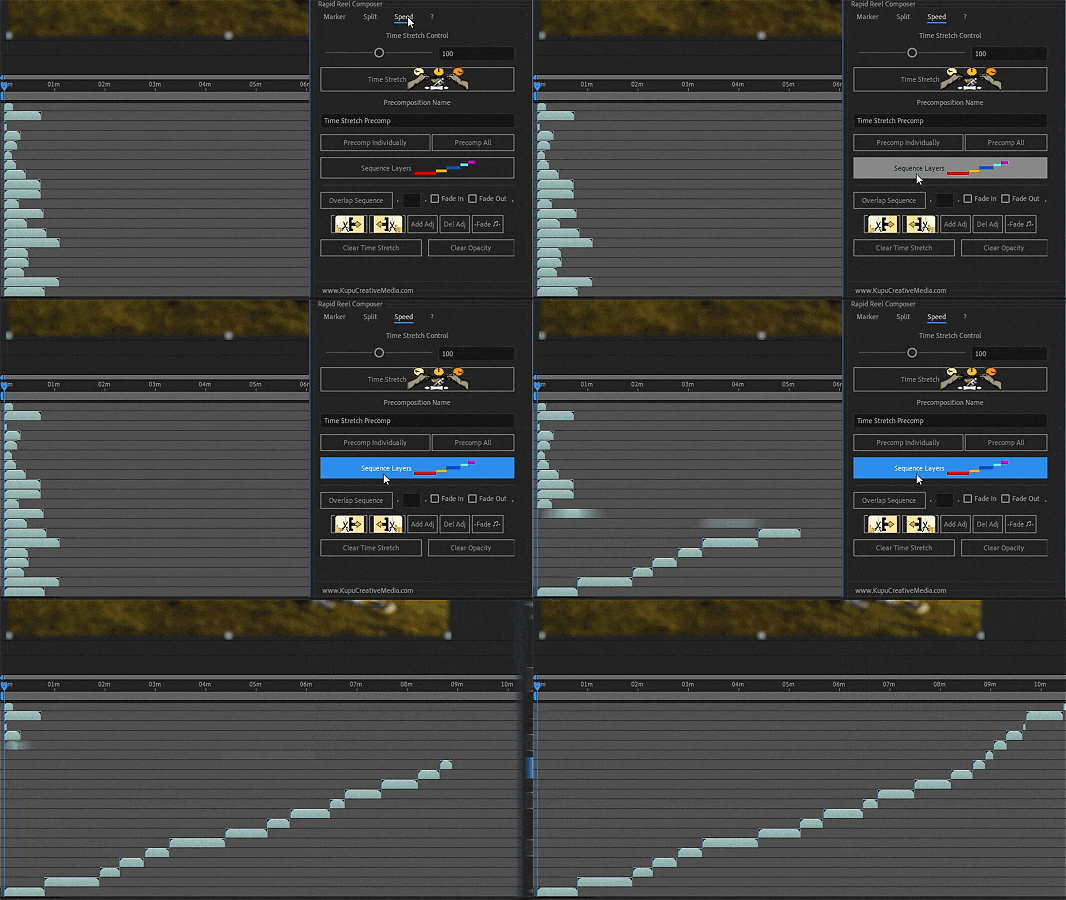
Sequence Layers: Start by importing all your footage and bringing it into the composition. To sequence or stagger the layers one after another, click the ‘Sequence’ button. Make sure to select the layers from the bottom to the top, as this is the standard editing order in After Effects.


